(The following is not in anyway an instructional on what you should do with your animals, only what we do. Please contact your livestock veterinarian for professional advise.)
On Knit and Purl's Birthday we also de-wormed them. (see June 28th, 2010 post
Knit and Purl Birthday Injections) Zach and I purchase our de-wormer medication at Tractor Supply Company. Make sure you read all instructions before administering. There are several different dewormers you can use. There are pellets, injectable, and oral injectable. We de-worm our goats every two to four weeks depending on the type of de-wormer we last administered. A lot of people don't de-worm that regularly. But we've read that it's better to be proactive than re-active. And we only have the two goats for now so it's not that expensive ot teadious. If your not sure when to de-worm you can check their eye color. The skin around their eyes should be nice and pink, or if their activity level starts dropping it may be time to de worm. Also check their droppings. They should be solid little pellets. If this changes it may be time to de-worm. You can also bring a stool sample to your veterinarian and they can do a worm count.
We also rotate the different methods. We inject them every six months, then alternate between pellets and oral injections during the remainder of the year. We've read that the worms can build a tolerance to a de-wormer over time and it's best to alternate. We use ... for our pellet de wormer. Read the labels of the different kinds. Some de-wormers only cover 2 worms others cover 3 ... covers... The dosage is based on weight. I measure out their dosages and put them in small zip lock bags so it's easy to administer once the medicine is down in the barn where we store it.
To make sure each goat gets the right amount we de-worn them before we feed them their grain ration for the day. Then we lock one girl out and let the other in to eat her de-wormer out of her bowl. If we were to feed them at the same time, Purl would bully her sister and eat both. This method is the easiest, but also the most expensive, but again we only have 2 goats so it's not that big of a deal. It's around $12.00 a bag and we get 24 doses, so it's not really going to break the bank.
For the injectable de-wormer we do it only twice a year, every six month, partially because it's a little stronger because it goes directly into the blood stream, and partially because it's an awful experience. We use Ivomectrin which is really a dewormer for cattle but veterinarians recommend it for goats as well. The problem though, is that the medicine is thick like molasses, so it takes forever to inject. And it burns. So you have a wiggling goat who doesn't want to be held down, who doesn't want to have a needle in it's thigh and then the medicine hurts. The first time we did it, we thought they were dying. They were belting and bawling and falling all over trying to lick the injection spot. They made the most horrible noises, and all we could do was hold them and try to comfort them. Zach had read that they do this, but to actually see it is so sad. To see how we give the girls injections check out the June 4th, 2010 blog.
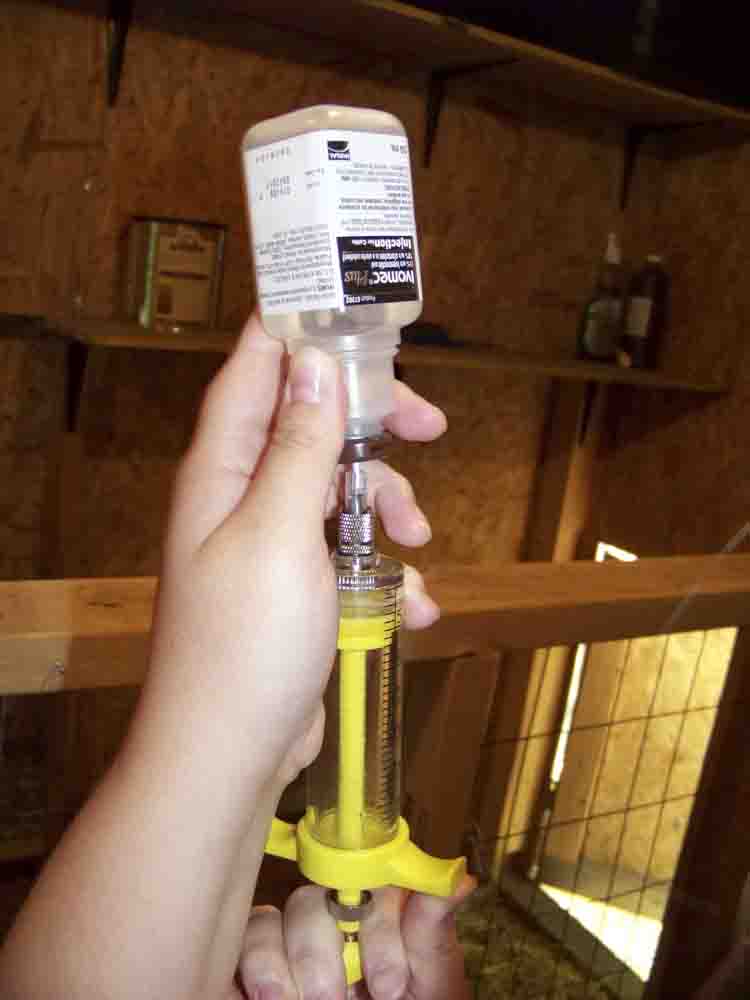
The third and maybe best de-worming method is oral injections. You can also administer Ivomectrin through an oral syringe, which is good because it's not that hard or painful for the goat and it's quite effective because it's Ivomectrin. We purchased a syringe at Tractor Supply we use the smaller one with the long metal tube that goes down their throat. Clean the syringe thoroughly with soap and water before and after use. You will still need an injection with a needle to get the medicine out of the Ivomectrin bottle because of the rubber seal, but you can just squirt it into the oral syringe. Take the needle and insert it into the rubber seal extract the correct dosage. Then unscrew the top of the oral syringe and squirt it into the tube. Your particular syringe may be different. Our metal tube wastes some of the medicine, so compare the two CC units. Then give it to the goats. Our goats are naturally curious about everything, and find it necessary to taste everything, coats, glasses, ponytails etc. So getting them to open their mouths around the syringe isn't really a problem, once their mouth is open I gentle shove it to one side of their tongue and down their throat. You don't have to go far, just enough so that they get most of it and it doesn't come out their mouth. They may cough a bit. After they seem to be ok, give them treats, so they know you love them and so they forget for next time.